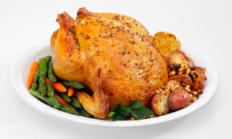
Here are my guidelines for cooking a roast turkey. These guidelines apply equally well to a turkey of any
size, or a large roasting chicken of over 5 pounds or so. As with all my traditional recipes, I learned all this
from my mother. Like Mom, I don’t marinate, grill or deep fry my turkey, although those methods are getting
more popular every year. I always stuff my turkey because the stuffing I think that is half the fun of having a
roast turkey dinner.
First, the question of: Fresh or frozen? For
me this comes down to whether I have time to
thaw a frozen turkey or not. If I have time I
always choose frozen since they are cheaper
and I cannot taste the difference. Frozen
turkeys often have broth injected into them so
that they might come out juicier, at the price of
paying turkey prices for the extra weight of the
broth.
Portions: There are lots of
complicated formulas to help you
calculate how large a turkey to buy, depending on how many people you need to serve. They
usually calculate at 1 to 1 ½ pounds of turkey per person. But I don’t pay any attention to these
formulas. I just get the biggest turkey I can buy because I always want a lot of leftovers that I can
either freeze or else just serve in a day or two.
Thawing: A frozen turkey needs several days to thaw in the refrigerator. Be sure to put it in
the fridge on a large platter to catch any leaks. You can allow about 1 day of thawing for every 4
pound of turkey that you have. Do not thaw the turkey outside of the fridge because that is an
invitation for nasty bacteria to grow. A fresh turkey needs to be cooked by the time of its
expiration date. You have about 3-4 days to cook a thawed turkey.
Preparation: I do all of this just before cooking, in a clean sink because of the liquids that will
spill out. Remove all of the covering from the turkey. You may want to cut around the label that
has the cooking times on it and set it aside. Look inside the turkey and remove the neck and
giblets. Look carefully in both ends of the turkey for all of the giblets, some of which will be
contained in a small paper bag. Many novice cooks forget this step and end up cooking the
turkey with the bag left inside the neck cavity. Set the neck and giblets aside if you want to use
them for the gravy LINK, otherwise discard them. Also remove the truss in the rear of the turkey
which is holding the legs together. This can be difficult, especially with the more inexpensive
turkey brands which may use an inexpensive truss. The truss can be made of metal or plastic
and needs to be removed. Usually it needs to be pinched together so that it can be pulled out. I
have been known to use a pair of pliers to get this done.
Preheat your oven to 325 degrees after you remove (while they are cool) any extra oven
racks that will be in the way if you have a big bird. Wash the turkey inside and out with salt water.
I just pour salt over and inside the turkey and rinse. Then stuff the turkey using stuffing LINK that
you have prepared. Resist the temptation to stuff the turkey the night before because that is
another invitation for nasty bacteria to grow. I fill the turkey cavity completely with stuffing,
allowing some room because the stuffing will expand. Don’t forget to stuff the neck cavity. Both
front and rear cavities need to be secured by sticking poultry pins (get these at a grocery store)
through flaps of turkey skin and closing off the cavities. Otherwise some stuffing will come
spilling out as the turkey cooks and the stuffing expands. I also use a couple of poultry pins to
pin up the wings to the body for appearance’s sake. Otherwise when they cook the wings can fall
away or fall off and look kind of silly when you remove the turkey from the pan.
Wash your hands and utensils frequently during this whole process, basically any time you or your utensils
have had contact with raw turkey. This is for food safety reasons, to avoid bacterial contamination.
I use my mother’s big dark enameled roasting pan for my turkey, uncovered. A dark pan shortens cooking
time slightly and has a tendency to brown the turkey faster. For a big turkey, I lay a turkey lifter into the pan
and then spray the whole inside of the pan and the lifter with cooking spray. You can get a turkey lifter at most
grocery stores to make it easy to lift out the heavy turkey when it is done. They are like little metal chains,
sometimes with a small metal platform to be placed in the middle of the pan. Don’t use the free lifters that may
come with the turkey and are made of string. They are too flimsy for me. When the oven is ready – set the
turkey in to cook.
Within the first hour of cooking, there will be enough juices collected in the pan to baste using a turkey
baster. Take the turkey out of the oven and set it on the stove briefly. Tilt the pan to one end so the juices roll
to one end and suck them into the baster then release them over the turkey to keep the all of the skin moist.
Then get the turkey back in the oven. After the first hour you can do this every half hour or so while the turkey
cooks.
Cooking Times – I use the little chart that comes with the turkey. Cooking times are a little longer with a
stuffed turkey. Here is a copy of one chart that I have:
Weight (pounds)
Unstuffed (hours)
Stuffed (hours)
7 to 9
2 – 2 ½
2 ¼ - 2 ¾
9 to 18
2 ½ - 3
2 ¾ - 3 ½
18 to 22
3 ½ - 4
4 ½ - 5
22 to 24
4 – 4 ½
5 – 5 ½
24 to 30
4 ½ - 5
5 ½ - 6 ¼
White meat cooks faster than dark meat so it is nearly impossible to cook the perfect turkey.
If you cook it too long, the white meat will be tough and stringy. If you undercook it, the white
meat will be tender and juicy but the dark meat will be red and somewhat raw, especially near the
highest thigh joint.
The solution is to try to cook it just right, not too tough for the white meat and just enough to
not have any raw dark meat. If you use a meat thermometer that means you will shoot for 180
degrees deep in the thigh, and 165 degrees in the middle of the stuffing.
If you do not use a thermometer (I don’t), here is what you can do. First, when you hold the
end of one of the drumsticks, you can move the leg almost freely. Try moving it before you put
the turkey in the oven so you will have an idea of how it starts out in comparison. Second, when
you prick the breast deeply, the juices should run out clear and not pink. When you prick the
thigh, the juices there should also run clear and not pinkish.
Keep an eye on the color of the turkey skin. It will probably begin to turn brown too much in
the last hour and a half or so of cooking. If this happens to you, take a large sheet of aluminum
foil and crease it lightly down the middle and float it over the turkey like a small tent. This will
keep the oven heat from turning the skin excessively brown during the last hour and a half or so
of cooking.
Ok once it is done, now it is time to take the turkey out of the oven for good. Place the turkey
pan on the stove and make sure that the turkey is not sticking to the pan. I use a large serving
fork and a large wok spatula to release the turkey from the pan. If you are using a metal turkey
lifter, be careful as the metal chain of the lifter will be very hot. Transfer the turkey from the pan
to a serving platter and let it cool for 15 minutes or so while you make final preparations for the
gravy (LINK) and the other side dishes.
After 15 minutes of cooling, the turkey is ready to carve. Find all of the poultry pins and
remove them (be careful, they are metal and may still be hot). Soak them in a cup of water so
that they are easy to clean later on. Spoon out the stuffing into a serving bowl and then carve the
turkey. Start the carving by separating the leg and thigh from one side, then separate the leg
from the thigh at the joint. To carve the breast meat, start with a horizontal cut along the bottom
of either the right or left breast and then make slices of breast meat that finish along that
horizontal cut. This is really hard to describe so check out the web for instructional photos and
videos that show you how to carve.
Finish your dinner in a tenth of the time it took to make it!
Now, for the leftovers. After your dinner, try to take all of the meat off of the bones before a couple of
hours go by, to prevent the growth of nasty bacteria. Store and/or freeze meat, gravy and stuffing in separate
containers because they can still contaminate each other even after they have been cooked. I don’t freeze
cranberry sauce or pies, but both leftover turkey and stuffing freeze well. Believe it or not, gravy freezes ok
too. You can enjoy your big turkey dinner over and over again!

How to Roast a Turkey or Chicken
Home | Indian Recipes | Thai Recipes | Main Dishes | Desserts | Leave a Comment | Recipes by Email | About
Copyright © Suzanne’s Recipe File | Privacy Policy


- Hot Chicken Salad
- Mom's Meatloaf
- Beef Stew
- Breakfast Casserole
- Quesadillas
- Beef Stroganoff
- Chicken in Brandy & Cream Sauce
- Chicken Pot Pie
- Puff Pastry Pizza
- Chicken Parmesan
- Home Made Meatballs
- Pasta Carbonara
- Pancakes!
- Pasta in Garlic & Oil
- Pasta Alla Maddy
- Pork with Lychees and Coconut Sauce
- Pasta Sauce from Tomatoes
- Lasagna
- Pasta in Oil and Garlic Sauce
- Pork Tenderloin with Porcini Mushroom-Aprcot Sauce
- Braised Pork with Watermelon
- Pork Tenderloin with Green Curry
- Roasted Butternut Squash with Chickpeas
- Mushroom Sauce for Pasta
- Taco Seasoning
- Tacos with Carnitas of Pork
- Beef Chili with Beans
- Chili with Black Eyed Peas
- Broccoli Quiche
- Roast Chicken or Turkey
- Barbecued Pulled Pork Sandwich
- Barbecued Pork ribs
- Chicken Adobo
- Empanadas
- Honey Baked Ham
- Shepherd's Pie
- A Complete Holiday Dinner


►Home- All Recipes
►Main Dishes
►Hot Chicken
Salad
►Mom’s Meatloaf
►Beef Stew
►Breakfast
Casserole
►Quesadillas
►Chicken in Cream
Sauce
►Braised Pork with
Watermelon
►Chicken with Goat
Cheese
►Chicken Adobo
►Chicken Pot Pie
►Pork with Coconut
Sauce
►Puff Pastry Pizza
►Spiced Chickpeas
with Roasted
Butternut
Squash
►Grilled Pork
Tenderloin with
Mushroom
Sauce
►Green Curry Pork
Tenderloin
►Chicken
Parmesan
►Home Made
Meatballs
►Pasta Carbonara
►Lasagna
►Pancakes!
►Pasta Alla Maddy
►Tomato Pasta
Sauce
►Pasta in Garlic
and Oil
►Marinara Sauce
►Mushroom Pasta
Sauce
►Coconut Chili
Sauce
►Empanadas
►Barbecued Ribs
►Barbecued Pulled
Pork
►Beef Chili with
Beans
►Chili with Black-
Eyed Peas
►Taco Seasoning
►Pork Carnitas
Tacos
►Broccoli Quiche
►Roast Turkey or
Chicken
►A Complete
Holiday Dinner
►Honey Baked
Ham
►Shepherd’s Pie
►Leave a Comment
►Get Recipes by
Email